
CLICK HERE FOR FREE BLOGGER TEMPLATES, LINK BUTTONS AND MORE! »
Showing posts with label MCT - My Creative Time. Show all posts

Tuesday, October 16, 2012

CAS(E) this Sketch! - Challenge #1

I sat and thought about the first CAS(E) this Sketch! Challenge all week before deciding what I wanted to produce.  For those who don't know, CAS(E) this Sketch! is a new blog that started two weeks ago, with a very talented line-up of ladies set to challenge us with wonderful CAS sketches.  

Definition of CAS and CASE


The acronym CAS stands for Clean and Simple.

1. Usually only one layer but can include a simple layer or two.

2. A lot of open space sometimes called "white space" can include color, texture or pattern.

3. Usually no embellishments but can include something minimal.

4. Minimal color palette.

5. Quick and easy to create.

The acronym CASE stands for Copy and Share Everything.


Their first challenge is this wonderful sketch:
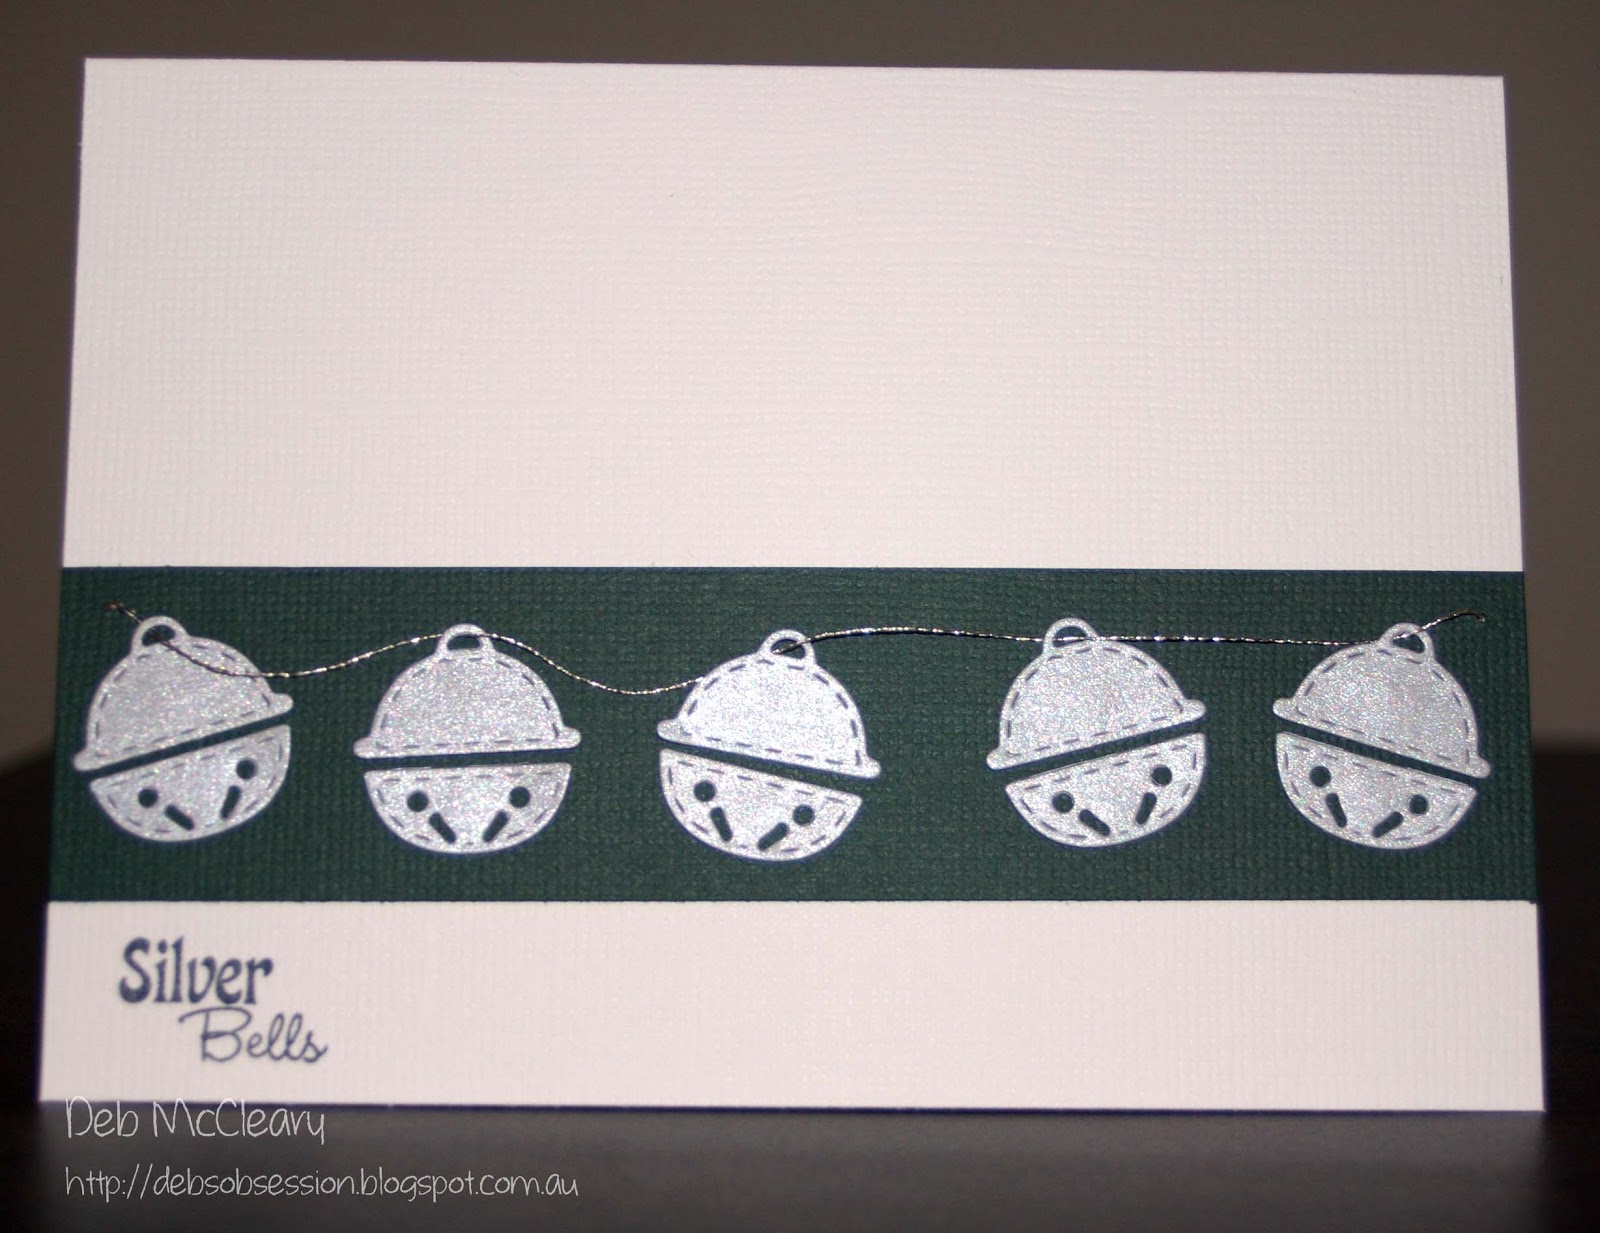
I wanted to produce another Christmas card, and so I got out my "My Creative Time - Warm Holiday Fun Stamp Set" to cut out the delightful little bells with the die.  I thread my five silver bells onto some silver DMC metallic thread and matted them on a simple strip of dark green cardstock.  This was then adhered to my basic white card, and the sentiment "Silver Bells" from the same stamp set was added.  Voila!
Hope you like it!
Cheers!
Deb. xo

WHOOPS!  I forgot the most important part of my creation!  In my rush to get it blogged before the deadline (ok, and before I went to the gym!), I forgot to add my stickles sparkle to one of my bells...  here is the updated photo!
 
Deb. xo

Sunday, October 7, 2012

PKS Challenge 38 :: Anything Goes

Time for another Peachy Keen Stamps Challenge, and this week it's "Anything Goes" (original post here).  The rules are very simple: you can make anything, but it must include a Peachy Keen Stamp.
I love the two little Angels in the "Our 2 Angels in Heaven" stamp set, so I stamped, Copic-coloured and close-cut them out.  Next, with my current passion for easel cards, I made a cardbase in white Kaszazz cardstock and used Wild Honey and Faded Jeans Distress Ink and the Inking Tool to create an ethereal background for my two gorgeous Angels.  I popped my Angels up on the background to give them more dimension.

I then cut out the "My Creative Time - Curly Label Die" with some vellum and stamped the sentiment "Believe!" from the O2AiH set in VersaMark, and heat-embossed it with Glossy Black embossing powder. This curly label was then adhered above the Angels' heads.  I doodled around the edge of the curly label with some silver gel pen.

I also cut out a piece of vellum and stamped the sentiment "Never fear... When angels are near!" and  heat-embossed that with Glossy Black embossing powder too.  This piece of vellum also had the silver gel pen doodling around the edge, and I corner-rounded two corners for a different look.

I'm really pleased with how the whole card came together!


Cheers!
Deb. xo

Saturday, October 6, 2012

Say It With... Thanks (AnnaBelle Stamps Challenge AC088)

Time for another weekly challenge over at AnnaBelle Stamps (original blog post here).  This week, the theme is Say It With... Thanks.
This week the challenge is to create a Thank You card that incorporates a Backgrounds By Design stamp into our design.  Unfortunately, I haven't got any of these wonderful background stamps yet, so I have resorted to using the wonderful Borders 1 die to create my background.  

I have then stamped and Copic coloured some daisies and leaves from the Daisy Delight stamp set.  I cut a tag die from MFT Dies, and used a sentiment from the "My Creative Time - So Grateful For You" stamp set.  I edged the double-matted daisies and the MFT Sentiment tag with Walnut Stain Distress Ink (hard to see in this photo - sorry!)

Happy World Card Making Day to everyone!

Cheers!
Deb. xo


1st Birthday Card!

My good friend has the most delightful little girl, and this little girl turns one today!  She is such a gorgeous bubba, and is quite possibly the most-loved child in our community - everyone wants to hold her and she goes to everyone!

So I wanted to make her a special birthday card today, using my new-found technique of easel cards.  There's nothing too technical about this one - I just stamped a cute little teddy bear and coloured her in pink with my Copics, cut her out and popped her up on the cardface.  I stamped a mini birthday cupcake over the cardface background and used the "My Creative Time - Stitched Circle" die and "My Creative Time - All Around Birthdays" stamp set.

I used a sentiment from the "Peachy Keen Stamps - Our 2 Angels in Heaven" stamp set and put a pretty pink button with silver DMC metallic thread through it.  Very simple card, but heartfelt...

Happy Birthday Princess Amelijah! [Hugs to you] sweet girl!

Deb. xo


Friday, October 5, 2012

Annabelle Stamps Challenge ABSC054 - Take 2!

I received more delicious AnnaBelle Stamps products in my happy mail yesterday, and couldn't wait to put together another entry for their weekly challenge - a sketch (challenge post here).  

 
I referred to some fun little baubles I had made previously with the Cuts By Design - Decorated Christmas dies and the new Decorated Christmas co-ordinating stamp set, and this new entry makes use of those!  I had played around with the dies and the decorated bauble stamps when I first got them last week, and I did some silver heat embossing on them - they came up a treat!  

Then, in my happy mail yesterday came along the fabulous Cuts By Design - Borders 1 die - perfect timing!

I have made my first easel card for this challenge entry, which in itself was a lot of fun.  The card face of the easel card is what I have decorated for this challenge, using a 4x4 piece of white cardstock.  I have made a red frame using the "My Creative Time - Just Simply Live" polaroid die, although I have removed the fancy edge for this piece.  I used a section of the Border die in dark green for the background of the frame, and then set my silver embossed baubles on silver DMC metallic floss inside the window.

I then double-matted some white cardstock on red, to put as the stopper of the easel card, and included the sentiment "Celebrate the Magic of Christmas" from the Jewelled Tree stamp set I also received yesterday.

A few bits of bling on the bottom of the polaroid die and some silver faux stitching around the sentiment, and my card is done!  I love it!


Thanks for visiting!
Deb. xo

[[Dang, I just missed the deadline for linking up - oh well, had heaps of fun anyway!]]

Monday, October 1, 2012

Fisherman Luka Birthday Card - Copic Colouring

Another week, another birthday/wedding/engagement/celebration of some sort!  It is my nephew's 21st Birthday today (wow!) and he loves fishing, so I thought I'd make him a birthday card with Fisherman Luka on it.  I'm really happy with the way Luka came out, colouring with my Copics - he's just so cute!  I also added some glossy accents to his eyes just to try it - I quite like it!

For the background of the card I've used my Distress Inks (Faded Jeans and Bundled Sage) to lightly daub directly onto the cardface.

I had cut out three fish from the Every Day Paper Dolls Cricut cartridge and I originally used each one as a mask on the background and went over it with Tattered Rose.  I then further highlighted each of the fish with some Crushed Olive, Wild Honey and Faded Jeans, and then highlighted the features with a Copic Multiliner.  The fish were then adhered to the card face.

I used the "Happy Birthday" sentiment from the "My Creative Time - Card Sentiments" stamp and die kit, and the "21" from the "My Creative Time - All Around Birthdays" stamp kit.

Finally, I cut Luka out, leaving a bit of white edge around him and popped him up on the front of the card for dimension.  I really like this card!


Thanks for visiting!
Cheers!
Deb. xo

Saturday, September 29, 2012

AnnaBelle Stamps Challenge - ABSC054

Having just recently purchased my first products from AnnaBelle Stamps, I couldn't wait to get to stamping with them!  I have fiddled around with the Cuts By Design - Decorated Christmas dies and the new Decorated Christmas co-ordinating stamp set and have created some fun little baubles that I will use on upcoming projects.  However, for the purposes of this AnnaBelle Stamps challenge I have stamped directly onto cardstock, by-passing the dies for now.  Here is a copy of the sketch we're to follow:
I have used Kaszazz Vanilla Cardstock for my base and have added a red cardstock cover sheet (from my stash).  I used the "My Creative Time - Just Simply Live" polaroid die to cut out a window in the red cardstock.  I then stamped christmas baubles from the Decorated Christmas set directly onto the Vanilla card base through the window.  I cut out the little tag die from the Cuts By Design set and stamped the border and the "Merry Christmas" sentiment from the stamp set.

I then edged the red cardstock with some Memento Rich Cocoa ink and adhered the red cardstock to the card base.  I added faux stitching around the perimeter of the window feature and added some bling to the bottom.  And here is my finished card...
Clean and simple, just the way I like it!  
Cheers!
Deb. xo


Thursday, September 27, 2012

Quilted Card - Thinking of You

Katie from "Crafting with Katie" had a post earlier today called Collecting Cards for Cancer Patients.  I think this is such a wonderful and worthwhile idea and so I wanted to practice some of my newly-acquired skills and techniques to a few cards that I could send to the Card Care Connection.  I thought a quilted card would be quite uplifting and quirky, and so I 'lifted' a new quilt pattern from here.
I wanted to use up some of the Creative Memories papers that I have in my stash, and so I pulled out the "Creative Memories - Primary (Tone on Tone)" papers to have a go.  I also used my Creative Memories Square Maker Punch (1") to cut all the individual squares that were needed (very fast doing it this way!).  I'm really pleased with how this came out...

I cut out the label from the "My Creative Time - Just Simply Live" stamp and die set, and stamped the sentiment 'Thinking of You" from the "My Creative Time - Card Sentiments" set. I added a bow made of red hemp twine and there is my first card for this worthwhile cause.

Here is my recipe:
- Yellow - 4 x 1" squares, diagonal
- Green - 4 x 1" squares, diagonal
- Purple - 4 x 1" squares, diagonal
- Purple - 4 x 1" squares
- Blue - mat, 4.25" x 4.25"
- Card base (Scrapbook Boutique - Vanilla) - 5.5" x 8.5"
- Blue for the label

This is just one colour scheme and layout for this particular quilting pattern.  There are so many more possibilities, and I might start to explore them too!

Thanks for the inspiration Katie!

Cheers!
Deb. xo


Rye Pier - 12x12 Layout

I thought I might put together another layout today, and chose to use more photos from a day trip I took with my own two kidlets and two 'ring-ins' as well (the 'ring-ins' being Tayah and Emily).  We had fish & chips at the foreshore picnic area in Rye before taking a long walk out on the Pier.


It's just a very simple layout, clean and symmetrical just the way I like them.  The base is a neutral colour textured cardstock.  I used my Walnut Stain Distress Ink to ink the edges of the base cardstock.  I have used Double Mates cardstock in Perfect Plum to mat the photos and some black cardstock to double mat the main photo and add a feature strip down the left side under the photos.  The title is cut from black cardstock using my Expression and the "Hannah Montana - Daddy's Girl" font (except for the word 'on' which is done using Making Memories Rub-Ons).

The pelican and the word 'beach' are from the "Life is a Beach" cartridge and I cut it out twice - once on black with all the guides removed and then once on grey.  I have then used my white gel pen and yellow Zig Writer to add feature and detail to the pelican.  Once he was adhered to the page I went back and put some light chalking detail around the pelican to give a beach effect.


I have used the faux stitching line stamp from the "My Creative Time - Gift Card Sentiments" stamp set to make guides for my journalling.  My final touch was to add some faux stitching of my own on some of the photo mats in black, and to add some seagull silhouettes to the upper part of the page (the sky!).

Cheers!
Deb. xo

Wednesday, September 26, 2012

70th Birthday Card - Two New Techniques!

So who's getting a bit clever then, eh??  In making a card for my friend to give to her M-I-L tomorrow, I have put together a masterpiece combining two newly-learnt techniques. 

Technique 1 is the Triple Time Stamping technique shown by Leanne over at Created By Leanne (original post here).

Technique 2 is the Simple Two-Step Stamping technique shown by Gayatri for the AnnaBelle Stamps Blog (original post here).

I love the overall effect of the card!  I finished it off by using the "My Creative Time - Stitched Circle" die and the "My Creative Time - All Around Birthdays" stamp set.

Hope you like it!
Cheers!
Deb. xo


Quilted Card - "Happy Holly Days"

I saw a fabulous card over with Katie at Crafting with Katie (original post here) for a Quilted Card.  I knew I just had to try it!


I've used "Echo Park - Very Merry Christmas" papers to create my card.  The recipe is as follows:

- Card base - 4.25" square
- Mat (Striped) - 4" square
- 9 x squares at 1.25" (4 x green; 4 x red; 1 x bauble pattern).  Green and Red squares cut on the diagonal to form triangles.
- 1 x ornament (Striped) from "My Creative Time - Warm Holiday Fun" stamp and die kit
- 1 x tag base (same as card base colour) from "My Creative Time - Teeny Tag Die" stamp and die kit
- Sentiment "Happy Holly Days" from "My Creative Time - From Our Family to Yours" stamp kit
- Hemp Twine


After cutting the red and green squares on their diagonal, I then joined a red diagonal cut and a green diagonal cut together to create new squares.  I then pieced the squares together in the same formation as with Katie's card.


Next time I might use a different contrast or different pattern papers to create a different look. 

Thanks for the inspiration Katie!

Cheers!
Deb. xo

Tuesday, September 25, 2012

MCT Technique Tuesday - "Enjoy the Ride" Triple Time Stamping

One last post for today (it's after 11:00pm here!).  But I just HAD to have a go at the Triple Time Stamping technique shown by Leanne at Created by Leanne for the My Creative Time "Show Me Your Technique" weekly mini-hop.  These techniques are so awesome, and it is really worthwhile hopping along with three to four of the fabulous Design Team members from MCT each Tuesday.  You never know what you might learn...

Anyway, so I have had a go tonight at the Triple Time Stamping, albeit a rushed go as it is a bit late!

I have again used the horse's head stamp and I have used a sentiment (Enjoy the Ride) from the "My Creative Time - Just Simply Live" stamp and die set.  I'm pretty happy with how it has turned out for my first go and I will definitely be exploring more combinations of colours and stamps in the daylight hours tomorrow!!


Thanks Leanne for showcasing such an awesome technique!

Have you noticed the improvement to the photography??  I might have a chat about that tomorrow...

Cheerio and goodnight blogisphere!
Deb. xo

Wedding Card - LOVE

I've got a busy couple of weeks coming up with two weddings, an engagement and a 40th Birthday - all within about six weeks...  YIKES!  The first wedding is this weekend and the bride loves all things BLUE!

So I thought I'd make a blue-themed card for the happy couple.  I started with some of my Shimmer Creative Memories Cardstock (I have quite a bit of it...) as the base.  I then cut out four scallops and circles, from the "My Creative Time - Scallop and Stitched Circle" die kit (scallop) and "My Creative Time - Build A Banner" stamp and die kit (small circle), also on Shimmer cardstock.

I then sprayed Blue Skies Glimmer Mist on the scallops to create a nice shade of blue.  I kept the circles at the original shade and stamped "L-O-V-E" on the four circles in Chipped Sapphire Distress Ink.  I then popped up the small circles on the scallops.

To bring the card together I matted a piece of navy blue metallic paper and I put a piece of organza ribbon across the length of the navy blue paper.  I then adhered the scallops to the navy blue paper and across the organza ribbon too.  I had made some tiny bows with fine white ribbon and put one on the top of each scallop with mini glue dots.  

To finish off the card I stamped the sentiment "Mr & Mrs" from the "My Creative Time - Teeny Tag Greetings" stamp and die set on the bottom right corner of the card.  


I'm thrilled with how this card came out.  I hope the bride and groom like it too!

Cheerio!
Deb. xo

"Dancing 2010" - Double 12x12 Layout

The scrapping bug has well and truly hit!  Of course I couldn't do a layout of my son's football photos without doing one for my daughter's dancing photos.  That just wouldn't be right!  So I grabbed out the photos from my daughter's first year at dancing and started planning.

I love simple layouts, relatively symmetrical, that can utilise the growing number of fun 'tools' I have in my scrap space.  I have also recently unearthed a rather large stash of Creative Memories papers and cardstock (purchased quite some time ago) that I have vowed to use up before buying more supplies.

I had already decided to use black textured cardstock as my backing pages for this double layout.  I then sourced some pink, red, blue and shimmer Creative Memories cardstock to mat the photos against and to cut out the lettering.


The lettering for "Jazz" and "Tap" was cut using the MS Word "Forte" font, and the "Dancing 2010" and "Studio One" was cut using the MS Word "Bauhaus 93" Font.  These were cut using SCAL.

I also used the leftover scraps from these cuts to cut out the label die from the "My Creative Time - Just Simply Live" stamp and die set, and used the alphabet stamps from that set to add detail.

The song for the Jazz number was "Three Wishes" and so I have used the alpha stamps to stamp that on the pink label.  The song for the Tap number was "Uptown Girl" and likewise I have stamped that on the red label.  On the first blue label under the "2010" I have stamped "First Year" and on the second blue label above the "Studio On" I have stamped "Kait & Emily".  My daughter has been doing these dancing classes with one of her close little friends for these past three years.

The most time consuming part of this layout was the faux stitching around each of the pages.  As it is on black, I first went around with my white gel pen, and then I used my red, pink and blue sparkly gel pens alternating so that they would stand out.  (I tried it first on a scrap bit of black without the white underneath - didn't have the same effect!).

I added some bling to the corners of the mats and finally used a "K" bling piece that I'd been hoarding since my daughter was born!

The final touch was some Stickles on the "Jazz", "Tap", "2010" and a line inside the "D" from "Dancing".


My daughter loves the layout and is now satisfied that she hasn't been left out (LOL, gotta love 7yo's!).  HOpe you like it too!

Cheerio!
Deb. xo

Sunday, September 23, 2012

16th Birthday Card - Horses

I still have my 'craft' on at the moment, and with my niece's 16th Birthday tomorrow, I wanted to make her a special card.  My niece is very much into her horses, and whilst I was tidying up my scrap-space, I found an old, cheap-ish set of stamps I had bought ages ago that was about horses.  I really liked the look of the circular horse-head silhouette and knew it would fit perfectly inside the stitched circle from the "My Creative Time - Scallop and Stitched Circle" die set.  

I cut a piece of Kraft Cardstock to make a 4"x4" card.  I then ruled lines at the 2" mark to create four squares on the front.  With my white Sakura Jelly pen I added faux stitching around the outside.  I then cut four stitched circles on plain white cardstock.

I edged three of the circles with my Chipped Sapphire Distress ink and the fourth one I lightly daubed the surface with the same colour. Using Memento Tuxedo Black, London Fog and Rich Cocoa, I stamped the horse silhouette once for each colour on the three white circles.  On the fourth circle that had been daubed with Distress ink, I stamped '16' in VersaMark ink and heat embossed with black embossing powder.  I then cut a Scallop Circle from the MCT die set in black for the '16' circle to sit on.

After putting each of the circles in the four squares of the card, I then added some bling to the card, and some black stickles to the alternate scallop petals (didn't really come out too well in the photo).


I hope my niece likes her card tomorrow, and I hope you like it too!!
Cheerio!

Deb.
xo

Saturday, September 22, 2012

Annabelle Stamps - Say it in...Shades of Pink Challenge

Feeling a bit crafty today, and thought I'd roam around some of my favourite blogs for some inspiration.  I happened across the Annabelle Stamps Blog: Say It In...Shades of Pink post and wanted to play along!

I cut a piece of pink cardstock at 4" x 8" for a 4" x 4" card.  I then added some White Gel Pen stitching around the front square of the card.  I cut the Frame Die from the "My Creative Time - Just Simply Live" set on white cardstock and used my Tattered Rose and Worn Lipstick Distress Inks to give it some feature.

I stamped a flower from the "My Creative Time - Bloom Where you are Planted" stamp set on white cardstock and coloured it in with my Copics.  I also shaded the background with Inkadinkado and Pebbles Chalks in pale pink.  This flower was then framed by the Frame Die and stuck to the front of my card.  I used the sentiment 'Friends are Flowers in the Garden of Life" from the "MCT - Bloom" stamp set as well, with Raspberry VersaColour Ink on the base of the Frame Die.

I threaded some DMC Rayon Stranded Floss through some buttons and stuck them down with glue dots to complete the card.  I hope you like it!


Cheerio!
Deb.
xo

Saturday, September 15, 2012

Getting my 'COPIC' on...

I've had a pretty tricky past 36hrs for assorted reasons, and so it's been WONDERFUL to be able to clear my mind with my crafting.  After putting together yet another Christmas card (MCT stamps and dies are so much fun to play with!), I thought I'd get back into some colouring.  I had come across a LaLa Land Stamps blog page and thought I'd get out one of my stamps and my Copics and have a relaxing evening watching the footy and colouring.

I chose Digger Luka for my stamp and set about colouring him in.  Once he was finished, I close-cut him out and re-inked his edges to give definition.  I had previously prepared a backing piece with my (new) Distress Inks (Bundled Sage and Wild Honey), and those colours seemed almost too perfect for my little Aussie Digger.  I popped Luka up off the card, and added the "True Blue Aussie" sentiment from the Digger Marci stamp.  Feeling somewhat patriotic this evening...  I hope you like him!
Deb.
 

Thursday, September 13, 2012

Some fun with my new MCT stuff!


Late last night I got to having some fun with my new Distress Inks.  I got to blending some Wild Honey, Bundled Sage and Worn Lipstick in different colour combinations.  The Bundled Sage and Worn Lipstick obviously gave a bit of a Christmassy feel and so this morning I went with that!  I stamped the line of holly from the My Creative Time - Warm Holiday Fun set and used Stickles to highlight.  I also used my VersaMark ink pad to stamp and heat emboss the sentiment "May your holiday sparkle and shine!".  I used Fantasy Gold embossing powder for a bit of extra sparkle.  I then used a black glitter pen to put some stitching around the edge.


Next up was drawing on the inspiration of the My Creative Time "Show Me Your Technique" mini blog-hops that run every Tuesday (here).  This week, Kim from "Scrapin Mom of One Inspiring Little Boy" was demonstrating her technique of using dies in ways different than the obvious (original post here).  So, using the My Creative Time - Warm Holiday Fun stamp and die set, I used the long christmas decoration as petals (and leaves) for a poinsettia flower.  I also used the MCT - Stitched Circle and the small circle from the MCT - Build A Banner kit to help build my poinsettia.


Pretty cute, right?  Then, further inspiration struck when I remembered the previous week's MCT SMYT post, where the lovely Glora from "Glora's Crafts" demonstrated using the VersaMarker watermark pen to add dimension to your work (original post here).  I just happen to have one of those VersaMarkers and it has added wonderful depth to my flower creation.  I have then finally put my card together using one of the Wild Honey distressed pieces of cardstock from last night and some stickles to the centre of the poinsettia.  I am really happy with the overall result.  Thank you to MCT for providing constant inspiration!
Deb.

Wednesday, September 12, 2012

Scrapbook Boutique Challenge - Buttons!

It's that time of the month again, with a new Scrapbook Boutique challenge (original post here).  The challenge this month is to create a project using this photo (below) as your inspiration & having 'Buttons, buttons & more buttons - include buttons.
The project can be a card, a scrapbook layout or off the page project......it's totally up to you!
 It seems strange, but again I knew straight away what I wanted to make.  I have had a layout in mind for a while, since our family portrait session last November.  It now seems perfect with this theme of buttons.  I hope you like it!


I absolutely adore the photo of my husband holding my daughter when she was about 2 weeks old.  It was such a tender moment and it warms my heart every time I look at it.  At our family portrait session last November, we thought it would be fun to re-create that photo (mainly with a view to me scrapping a page with them!).

My daughter's nickname as a baby was always "Button Nose" - partly because of how cute she was, but also because in my family, we each have a button-ish looking nose and it's quite a strong trait right throughout my father's family.

With all this in mind, how could I not jump right into Scrapbook Boutique's Button Challenge this month?!!

The funky purple border was created using the Accent Essentials Cricut Cartridge on my Gypsy.  I selected the border on the last row, second button from right and welded it in a row of 3 (at 1.25").  I then copied and rotated it to make a border, welding it all together.  Once it was cut out, I stuck it down (very carefully!) to my paper (just from my 'stash') and highlighted the solid circles with button-holes, and put white stitching around the border piece.

I matted the photos on co-ordinating cardstock.  I then cut a Fancy Frame Die (from My Creative Time), and also used the Fancy Frame Stamp on it, for my sentiment "Tender moment re-created".  I cut out the label die from the My Creative Time - Just Simply Live set, and used the alphabet stamps from that set and some purple VersaColour ink to stamp "BUTTON NOSE".

Using some old rub-ons I recently 'unearthed' from my stash, I used Making Memories - Heidi and Making Memories - Beach (both in black) to put my question "Your nickname as a baby?".

I finished off the project with a bunch of co-ordinating buttons and "Ta-da" - my first scrapbooking page in ages!  Thanks SBB for the mojo to actually complete a page!

Deb.

Monday, September 10, 2012

MCT Designer Challenge - 3 "R"s with hostess Veronica

I love the idea of Veronica's challenge - Reduce, Reuse, Recycle - over on the My Creative Time blog (original post here).  Every other Thursday, a wonderful Design Team Member of MCT will be 'hosting' a challenge of their choice.  This fortnight, Veronica from VK Create has challenged us to create a fabulous project using at least one recycled item.  I knew straight away what I wanted to do because I have been tossing this idea through my head for quite a while.

I do all of my photo printing at home myself on my wonderful Epson Stylus printer.  The quality just can't be beaten!  Anyway, so I go through many packets of 4"x6" Epson photo paper, and in each packet is a piece of 4"x6" chipboard card. 


I have been saving these pieces of chipboard "just in case" for ages.  When this challenge came up, I decided to make a little booklet showcasing some of my favourite photos from a family portrait session from last November, and using these chipboard pieces.


Our family 'colour scheme' for the photo shoot day was green and black, but I also liked the photos in black and white.  So I selected this striped paper with the lime green together with a pale purple-ish tinge to it to set off the black and white photos beautifully.  I adhered the paper to the chipboard pieces and filed the edges down to make them smooth.  I used offcuts of black cardstock to mat the photos as well.

Once upon a time in my crafting life I had a real 'thing' for rub-ons.  I went crazy for them and bought up a whole lot of them.  Then my 'fad' passed and I was left with a whole lot of them (such is the life of us crafters, I reckon!)  Anyway, I wanted to jazz up the photos a bit and so I used some rub-ons to add sentiments to these photos.  I also selected some lime green and purple buttons, and used DMC floss threaded through the buttons for a bit of extra something.

I then bound the whole thing (all five pages) together with green organza ribbon I picked up on sale, and made extra bows with offcuts of white organza ribbon as well.

And there is my contribution to the MCT Designer Challenge for this fortnight.  Hope you like it!
Deb.